Sử dụng redux trong Next.js là việc cần thết, vì Redux giúp tổ chức, quản lý dữ liệu chung cho toàn bộ ứng dụng, cho mọi component dùng chung
Giới thiệu redux và các khái niệm cơ bản
Redux là một thư viện quản lý state tập trung, giúp dễ dàng quản lý dữ liệu trong ứng dụng React/Next.js. Dưới đây là các khái niệm quan trọng:
- store: Là kho chứa toàn bộ state của ứng dụng. Mỗi ứng dụng chỉ có một store duy nhất. Có thể hình dung store là database trong ứng dụng của bạn
- state: Là giá trị dữ liệu tại một thời điện đang được lưu trữ trong store.
- slice: Là nơi chứa các hàm(action) để cập nhật state
Sử dụng Redux giúp quản lý state trong toàn ứng dụng, đặc biệt khi ứng dụng có nhiều component chia sẻ dữ liệu với nhau
Cài đặt redux vào ứng dụng NextJS
Chạy lệnh sau trong folder ứng dụng để cài đặt React-Redux và Redux Toolkit (thư viện bổ sung cho redux)
npm install react-redux @reduxjs/toolkit
Tạo redux store
Tạo folder gì đó (ví dụ lib) trong folder dự án, tiếp theo tạo file lib/store.ts và thiết lập Redux store:
import { configureStore } from '@reduxjs/toolkit';
import counterReducer from './counterSlice';
export const store = configureStore({
  reducer: {
    counter: counterReducer,
  },
});
export type RootState = ReturnType<typeof store.getState>;
export type AppDispatch = typeof store.dispatch;
Giải thích:
- configureStore: là hàm dùng để tạo store (kho chứa dữ liệu trong ứng dụng của bạn)
- reducer: Chứa danh sách các slice bạn tạo ra để quản lý dữ liệu trong store
- RootState: Kiểu dữ liệu của Redux Store (cần khai báo khi dùng TypeScript).
- AppDispatch: Kiểu dữ liệu cho dispatch.
Tạo slice
Khi dùng redux để chứa dữ liệu tập trung, bạn có thể tạo nhiều slice , mỗi slice lưu trữ một lại dữ liệu. Mỗi slice là 1 file.
Tạo file lib/counterSlice.ts và code
import { createSlice, PayloadAction } from '@reduxjs/toolkit';
interface CounterState {
  value: number;
}
const initialState: CounterState = { value: 0 };
const counterSlice = createSlice({
  name: 'counter',
  initialState,
  reducers: {
      increment: (state) => {  state.value += 1; },
      decrement: (state) => { state.value -= 1; },
      incrementByAmount: (state, action: PayloadAction<number>) => {
         state.value += action.payload;
      },
  },
});
export const { increment , decrement , incrementByAmount } = counterSlice.actions;
export default counterSlice.reducer;
Giải thích:
- createSlice: Dùng để tạo một slice
- initialState: Giá trị ban đầu của counter.
- reducers: Chứa các hàm cập nhật state (increment, decrement, incrementByAmount).
- actions: Các hành động có thể dispatch để thay đổi state.
Cấu hình redux provider trong Next.js
a. Tạo file ReduxProvider.tsx để code tạo một Provider bọc quanh ứng dụng.
"use client";
import { Provider } from "react-redux";
import { store } from "../store/store";
export default function ReduxProvider({ children }: { children: React.ReactNode }) {
  return <Provider store={store}>{children}</Provider>;
}
Lưu ý:: use client để đảm bảo ReduxProvider chỉ chạy ở client-side.
b . Sử dụng ReduxProvider rrong layout.tsx
Mở file app/layout.tsx:
import ReduxProvider from "@/lib/ReduxProvider";
export default function RootLayout({ children }: { children: React.ReactNode }) {
  return (
    <html lang="en">
      <body>
        <ReduxProvider> {children} </ReduxProvider>
      </body>
    </html>
  );
}
Bây giờ, Redux đã sẵn sàng và bạn có thể sử dụng nó trong các component Next.js . Sau đây là ví dụ dùng Redux trong component
Sử dụng redux trong component
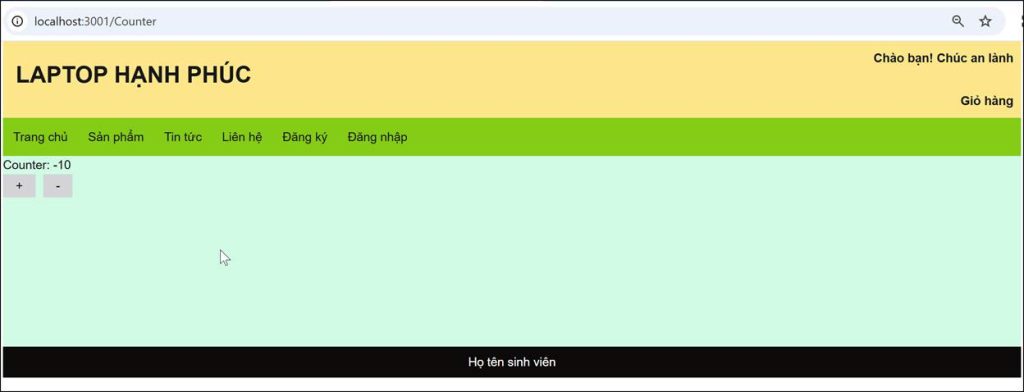
Trong app, tạo folder counter, rồi tạo file page.tsx
import { useSelector, useDispatch } from 'react-redux';
import { increment, decrement } from '@/lib/counterSlice';
import { RootState } from '@/lib/store';
const Counter = () => {
  const count = useSelector((state:RootState) => state.counter.value);
  const dispatch = useDispatch();
  return (
   <div>
     <h1>Counter: {count}</h1>
     <button onClick={ ()=>dispatch(increment()) }
     className='bg-zinc-300 py-1 px-5 mr-3'> + </button>
     <button onClick={ () => dispatch(decrement()) }
     className='bg-zinc-300 py-1 px-5'> - </button>
    </div>
  );
};
export default Counter;
Giải thích:
- useSelector: Lấy dữ liệu từ Redux Store.
- useDispatch: Gửi actions để thay đổi state.
Tóm lại:
- Redux Store được cấu hình trong store/store.ts.
- Sử dụng lệnh createSlice để tạo state.
- Bọc Redux bằng ReduxProvider.tsx
- Sử dụng Redux trong component với useSelector và useDispatch.
Cần xem thêm thông tin, mời bạn xem link này https://redux.js.org/usage/nextjs


